A Comprehensive Guide to Engine Assembly: Key Insights and Best Practices
Introduction
Engine assembly is one of the most crucial processes in the automotive and mechanical industries. It is the process of constructing an engine by putting together its various components to ensure it functions effectively and efficiently. Understanding engine assembly is essential not only for professionals involved in engine manufacturing but also for enthusiasts and those looking to repair or rebuild engines.
In this guide, we will explore the fundamental aspects of engine assembly, including the steps involved, the tools and equipment required, common mistakes to avoid, and best practices to ensure high performance and durability. Whether you are a mechanic, a DIY enthusiast, or someone looking to delve deeper into the mechanics of engine assembly, this comprehensive blog will provide valuable insights.

Understanding the Basics of Engine Assembly
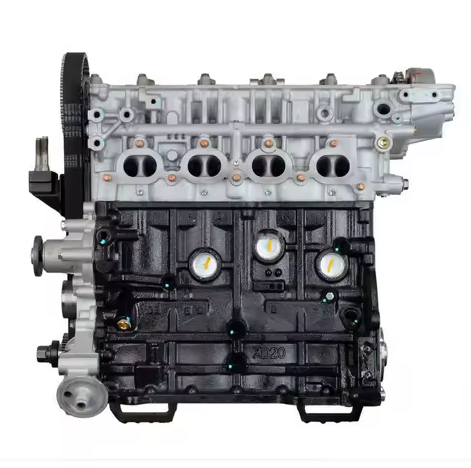
Before diving into the specific steps and processes involved, it’s essential to understand what engine assembly entails. At its core, engine assembly involves fitting together various engine components such as pistons, crankshafts, camshafts, valves, and cylinder heads to form a fully functional engine. The assembly process is methodical and requires precision, as any error can lead to engine failure.
Key Components of an Engine
- Block: The foundation of the engine. It houses the pistons, crankshaft, and other critical components.
- Pistons and Connecting Rods: Pistons transfer energy from combustion to mechanical work. Connecting rods link the pistons to the crankshaft.
- Crankshaft: Converts the reciprocating motion of the pistons into rotational motion.
- Cylinder Head: Contains components like the intake and exhaust valves, spark plugs, and camshafts.
- Camshaft: Controls the opening and closing of the engine's valves.
- Valves: Allow fuel and air into the combustion chamber and exhaust gases to exit.
Importance of Engine Assembly
A well-assembled engine ensures optimal performance, longevity, and fuel efficiency. The precision and care taken during the assembly process directly impact the engine's power output and reliability. Proper assembly also helps prevent common engine issues such as misfires, overheating, and inefficient fuel combustion.
Steps in the Engine Assembly Process
The engine assembly process is broken down into several steps, each requiring attention to detail and precision. Here’s a step-by-step guide to assembling an engine.
Step 1: Preparing the Engine Block
Before assembling the engine components, ensure the engine block is clean and free of any debris. This involves washing the block with solvents and inspecting it for cracks or wear. Any imperfections in the block must be addressed to avoid future mechanical problems.
Step 2: Installing the Crankshaft
Once the block is clean, the crankshaft is installed. The crankshaft is a central part of the engine's operation, as it converts the motion from the pistons into rotational motion. Installing the crankshaft requires attention to the bearing caps and their proper torque specifications. Ensure the crankshaft is aligned correctly to avoid premature wear.
Step 3: Attaching the Pistons and Connecting Rods
Pistons and connecting rods are typically installed next. Begin by inserting the piston rings into the pistons and ensuring they are correctly aligned. The connecting rods are then attached to the pistons. It’s crucial to pay attention to the orientation of the pistons and connecting rods, as misalignment can cause engine damage.
Step 4: Installing the Cylinder Head and Valves
After the pistons are in place, the cylinder head is installed. The cylinder head contains the valves, camshaft, and other essential components. Valve springs are installed, and the camshaft is positioned in the head. The cylinder head must be torqued properly to ensure a tight seal and prevent leaks.
Step 5: Timing the Engine
Timing is a critical aspect of engine assembly. Proper valve timing ensures that the intake and exhaust valves open and close at the correct moments in the engine’s cycle. The timing belt or chain is installed at this stage, and the camshaft timing is adjusted to align with the crankshaft.
Step 6: Installing the Oil Pump and Timing Components
The oil pump is essential for circulating oil throughout the engine to keep the moving parts lubricated. It is installed next, followed by any timing components such as the timing gears or chains. These components must be torqued correctly to ensure the proper operation of the oil pump and timing system.
Step 7: Final Checks and Assembly of External Components
Once the internal components are assembled, the engine is checked for any gaps, leaks, or misalignments. The external components such as the intake manifold, exhaust manifold, and fuel system are installed. Additionally, the ignition system, including the distributor, spark plugs, and coil, is also put in place.
Tools and Equipment Required for Engine Assembly
Proper tools and equipment are essential for successful engine assembly. Here’s a list of key tools needed for the job:
Essential Tools
- Torque Wrench: Used to apply the correct amount of torque to fasteners, ensuring proper tightness without over-tightening.
- Piston Ring Compressor: Helps in compressing the piston rings for installation into the cylinder.
- Engine Hoist: Used to lift and position heavy engine components.
- Feeler Gauges: Used to measure clearances between parts such as the valve lash or piston-to-wall clearance.
- Camshaft Bearing Installer: Helps in installing the camshaft without damaging the bearings.
- Measuring Tools: Precision tools such as micrometers and calipers are essential for measuring clearances and tolerances during assembly.
- Sealant and Gasket Kits: To prevent oil and coolant leaks after assembly.
Advanced Equipment
- Engine Stand: Holds the engine in place while you work, allowing for better access and control.
- Parts Washer: Used to clean components before assembly to remove any contaminants.
- Engine Assembly Lube: Special lubricants designed to prevent premature wear during the break-in period.

Common Mistakes in Engine Assembly and How to Avoid Them
Even experienced mechanics can make mistakes during engine assembly, which can lead to costly repairs or engine failure. Here are some common errors to avoid:
1. Not Following Torque Specifications
Each component of the engine must be torqued to specific values. Failing to follow these torque specifications can result in under-tightened parts, causing leaks, or over-tightened parts, which can cause damage. Always use a torque wrench and verify torque settings in the service manual.
2. Incorrect Timing
Engine timing is critical for proper engine function. Incorrect timing can result in poor engine performance, overheating, and potential engine damage. Always double-check timing marks and consult the engine’s manual for accurate timing procedures.
3. Ignoring Cleanliness
Contamination is a major cause of engine failure. Dust, dirt, or foreign particles can cause internal damage to critical engine components. Keep the workspace clean and use proper cleaning solutions for parts.
4. Not Using Assembly Lubricant
Many components need to be lubricated during assembly to prevent wear during initial startup. Failing to lubricate components like camshafts, bearings, and pistons can lead to premature failure.
Best Practices for Successful Engine Assembly
To ensure a high-quality engine assembly, here are some best practices:
- Work in a Clean Environment: Keep the engine and tools clean to avoid contamination.
- Follow the Manual: Always refer to the manufacturer’s manual for specifications and assembly instructions.
- Use Quality Components: Ensure that all parts are of high quality, as inferior components can compromise engine performance.
- Stay Patient: Engine assembly is a precise process that requires time and attention to detail. Don’t rush the process.
- Test the Engine: After assembly, perform initial tests such as compression tests and oil pressure checks to ensure the engine is functioning properly.
Conclusion
Engine assembly is both an art and a science, requiring precision, knowledge, and the right tools. By understanding the essential components, the assembly steps, the required tools, and the common pitfalls, you can ensure the successful assembly of a powerful, efficient, and durable engine. Whether you are assembling a new engine from scratch or rebuilding an existing one, following these steps and best practices will help you achieve optimal results.
By investing time and care into each step of the engine assembly process, you are setting the stage for a high-performance engine that will stand the test of time.
FAQs
1.How long does it take to assemble an engine?
The time it takes to assemble an engine depends on the complexity of the engine and the experience of the mechanic. On average, a full engine assembly may take anywhere from 12 to 30 hours.
2.What tools do I need to assemble an engine?
Essential tools include a torque wrench, piston ring compressor, engine hoist, feeler gauges, and assembly lube. Advanced tools like an engine stand and parts washer can also be helpful.
3.How can I avoid mistakes during engine assembly?
To avoid mistakes, follow the manufacturer's specifications carefully, use proper lubrication, work in a clean environment, and take your time to ensure accuracy in every step.
4.Can I assemble an engine myself, or should I seek professional help?
While assembling an engine requires knowledge and precision, if you have the proper tools, experience, and patience, you can assemble it yourself. However, for complex or high-performance engines, it may be advisable to consult a professional.
